

Back in 2010 I made a series of illustrations featuring incandescent bulbs. Since the light bulb is the symbol for the birth of an idea, I played on this visually for a while, using them in place of blades of grass, flowers, and the like.

Like my delta robot army, this project was inspired by these ‘idea’ illustrations from the past. I have always wanted to make a bouquet of light bulbs that was portable, and finally with the right materials and a little push from my friend… I sat down this week and made it happen.
A couple of months ago my collaborator Mark picked up a plastic transparent Christmas ornament from the craft store and suggested I use something like it as an alternative to actual glass. I agreed with him, but the Christmas bulbs weren’t the quirky up-side-down pear shape incandescent bulbs are, and the plastic had an unsightly seem all the way around its exterior, as well as a nipple on the top from the mould it was made in. Not too pretty.
Never the less, I started thinking of ways I could possible simulate filament. Since I wanted to make the bouquet portable, LEDs were a must. I first attempted to solder some thin wire directly to surface mount components…….. thinking this would be more delicate and filament like. Of course, this turned out to be way more fragile than I thought it would be, and the end product wasn’t worth the amount of time it took trying to get the carefully soldered specs back into the bulbs without the connection breaking apart!

So I set the idea down for a while… until this Monday when I found myself standing in front of an isle of premature Christmas crap at Michael’s. I saw I could buy six-packs of these ornament bulbs. So, I picked up three boxes and was pleasantly surprised to find that they weren’t made of cheap plastic like the one Mark picked up, but were some sort of simulated craft glass that was durable, yet transparent and seamless. NICE!
On the way home, I grabbed some 1/4 inch vinyl tubing from Home Depot. The next day, I raided Mark’s spacious work room and cut a bunch of 32 inch pieces of this tubing for my flower’s ‘stems’.

Once cut, the tubing still wanted to conform to its rolled up state, so I stretched the pieces across two horses and blasted them with a hot air gun to slightly melt the material and help them straighten out. This method didn’t work too well, so I ended up pushing some long pieces of steel wire through the middle of the tubing to force it to keep its shape while cooling. The steel wire inside also got pretty hot which I think helped melt and reset the vinyl on the inside of the tubing. After this they were perfectly straight.

Next I connected the bulbs to the steams. This called for a custom piece that I designed in sketchup and printed in black ABS. The cap has a 6mm hole all the way through the center for the steam to slide into, as well as a small 1mm lip close to the top for the 5mm LED to sit on top of. The whole thing fits over the neck of the bulb much like the foil ornament cap they came with :


I ended up making several versions of this end cap because the lip where the ‘craft glass’ was cut on the neck of the bulb had varying degrees of thickness and irregularities from piece to piece. After about four revisions, I had enough caps (and plenty of extras) to fit all of my bulbs. I still added some vinyl tape to the necks so that there was something for the caps to compress onto. One or two layers did the trick.

The next step was cutting some slits in the steams where I anticipated my power supply and chip were going to go. I measured seven inches down from the top of the steams which was where it felt natural to grip the full bundle like an actual bouquet.

After making a triangular hole in each one of them at around this spot, I fed two pieces of black stranded wire through up to the top, making sure to mark one on the top and bottom so I could tell it apart from the other…. these would end up being my ground and power lines from each LED to the board.
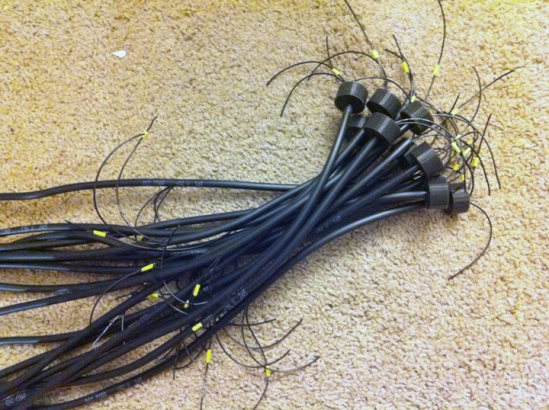
I planned to use two AAA batteries as my power supply at 3 volts, so I soldered some 68 ohm resistors to the positive leg of each LED.

Next I soldered these LEDs to the wires I fed through the tubing.

Once this was done I cut a piece of through hole board to the size of the ATmega 328p chip. I left two extra rows of holes on either side, one for soldering to and the other as strain relief for my wires.

With all the wires poking out from the many steams of tubing it was time to start the pain staking chore of soldering this mess in some sensible order to the board. This took some trial and error… but I got it put together in some orderly fashion (plus added my programming header and my crystal!) :

Once I managed this with help from Mark, I uploaded some old soft PWM code from a project I did earlier this summer that fades a set of LEDs at random on and off. Once this was burnt to my chip, I checked to makes sure everything was working right and that the bulbs were on tightly enough.
In the end I needed to use adhesive to get the bulbs to stay inside of the caps I printed. Sadly, as the tape got warm… the glue would get melty and I lost a few to the hard floor. =[
If I ever get married, this will be my prop. However, I’m thinking that it needs to be twice as dense, and maybe twice as bright too. I need to diffuse the light a bit better and perhaps use an LED with a wider lens angle. There is room for improvement, but this is a great starting point. With under 20 bucks of materials and a few open days this week I was able to pull one of my illustrations into reality =]

We did a little photo shoot out back by Mark’s torn up shed thinking it was visually artsy, and managed to get a couple of good shots :


Reblogged this on and commented:
To fly for a regular bouquet of flowers? Impress your girlfriend with this!